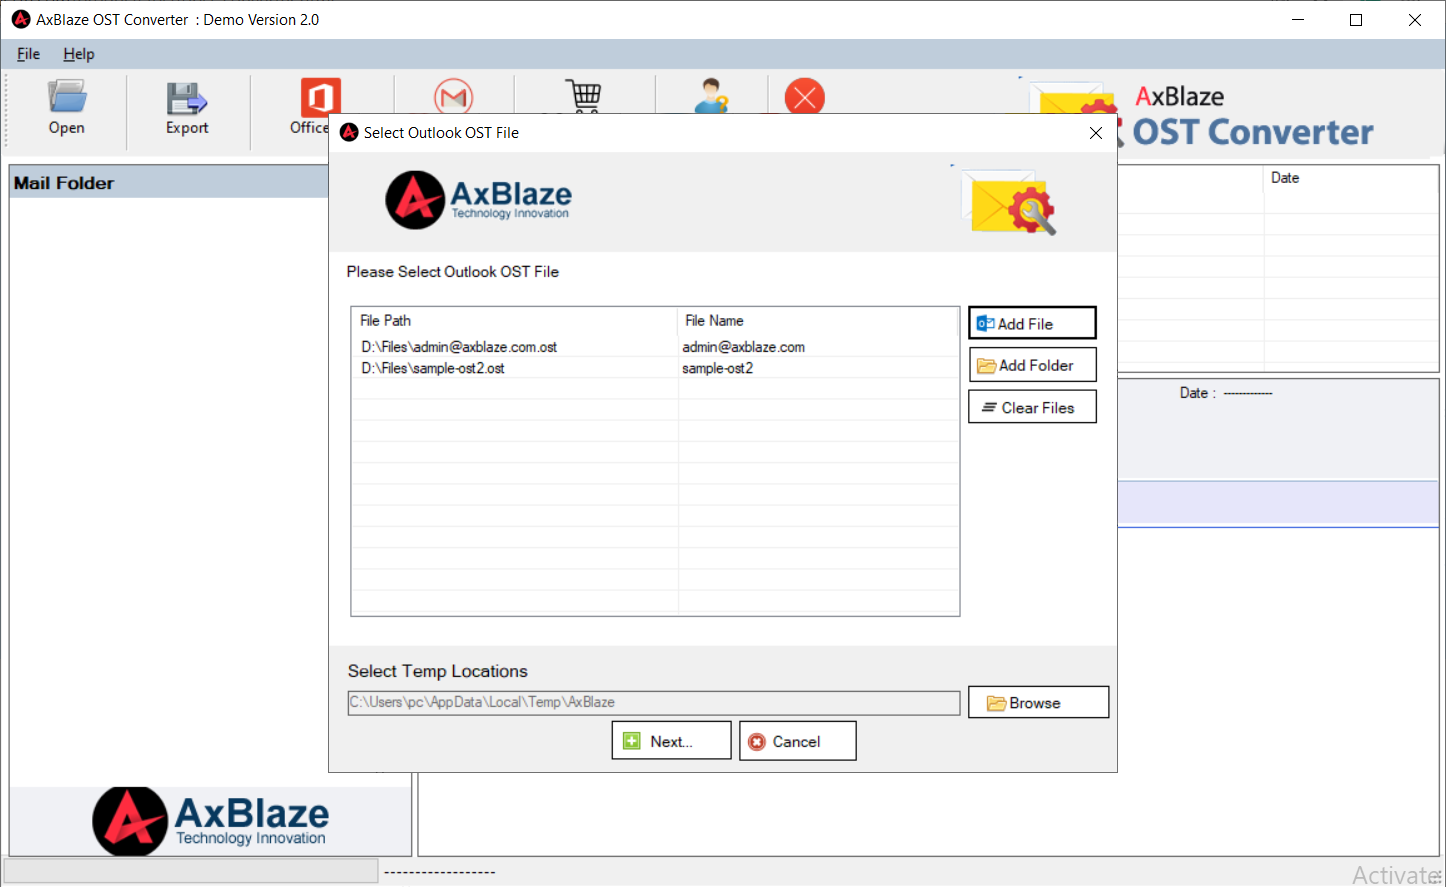
Step 1:
Download, Install and Run AxBlaze OST to PST Converter.
Click the "Open" button to browse the OST file.
- Add File: Select the OST file one by one.
- Add Folder: Select the OST folder containing multiple OST files
- Clear Files: This option helps to remove unwanted OST file(s).
Click the "Next" button.
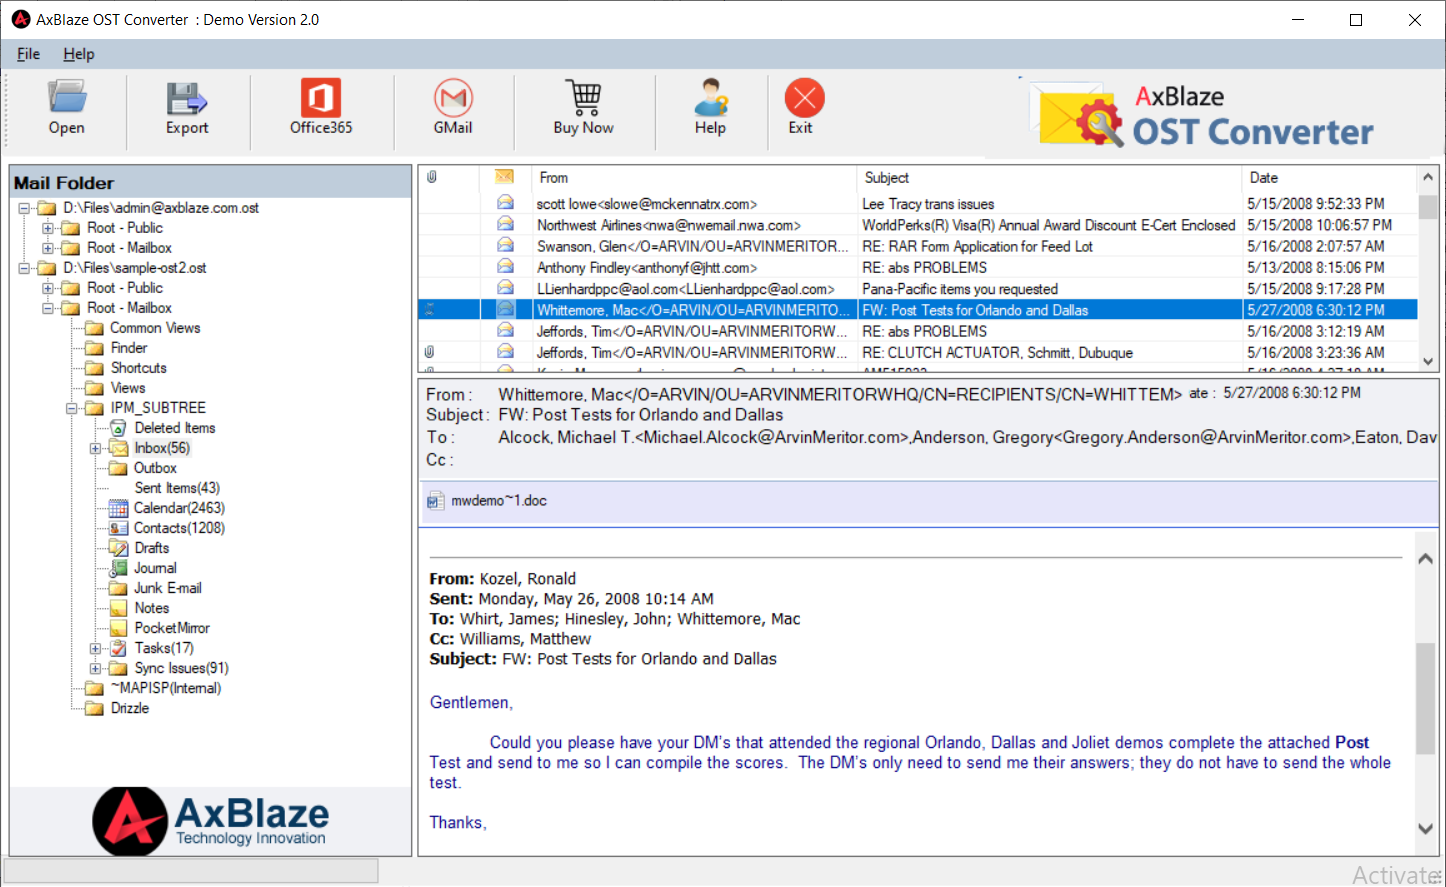
Step 2:
Check the preview of the OST file.
- Check a complete preview of every email with exact metadata information and attachments.
- Check the number of items in every folder of the OST file.
It ensures the complete conversion of the OST file.
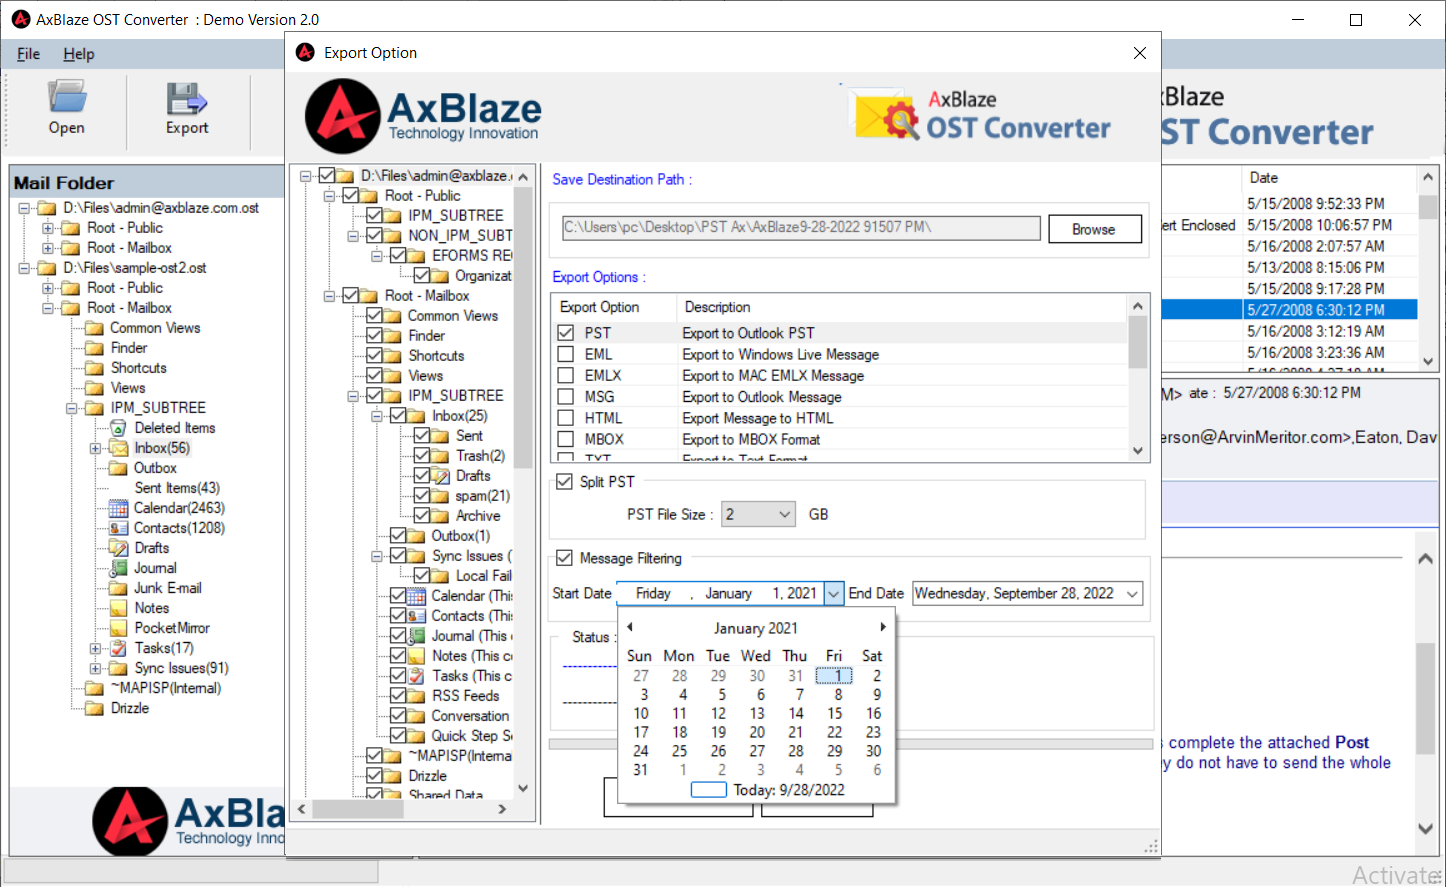
Step 3:
Export Option: Click the "Export" option from the menu.
- Save Destination Path: Click the "Browse" button to select the destination path.
- Export Option: Select the PST as an export option.
Move to the next step.
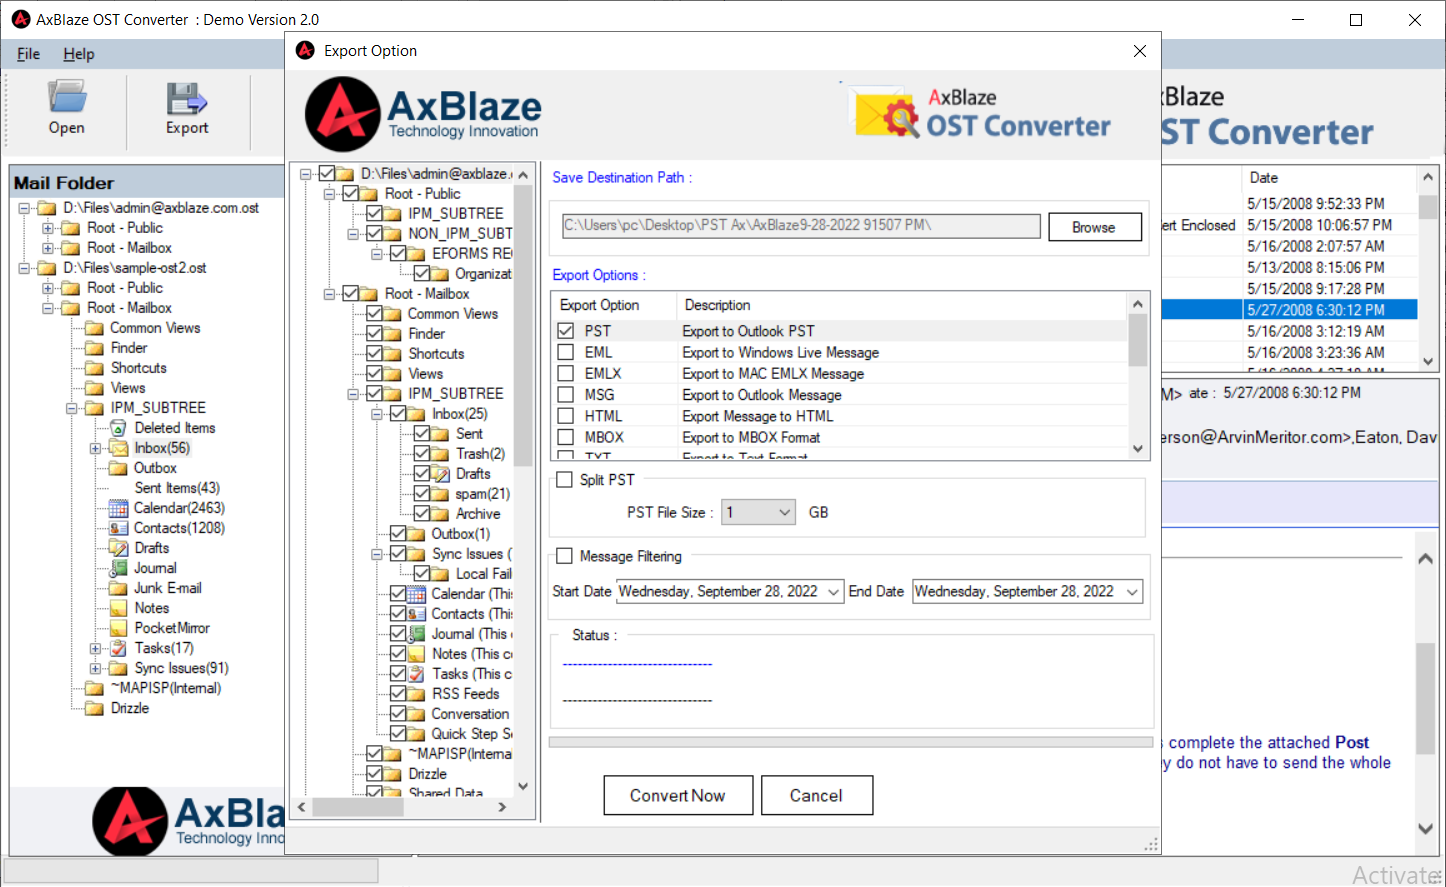
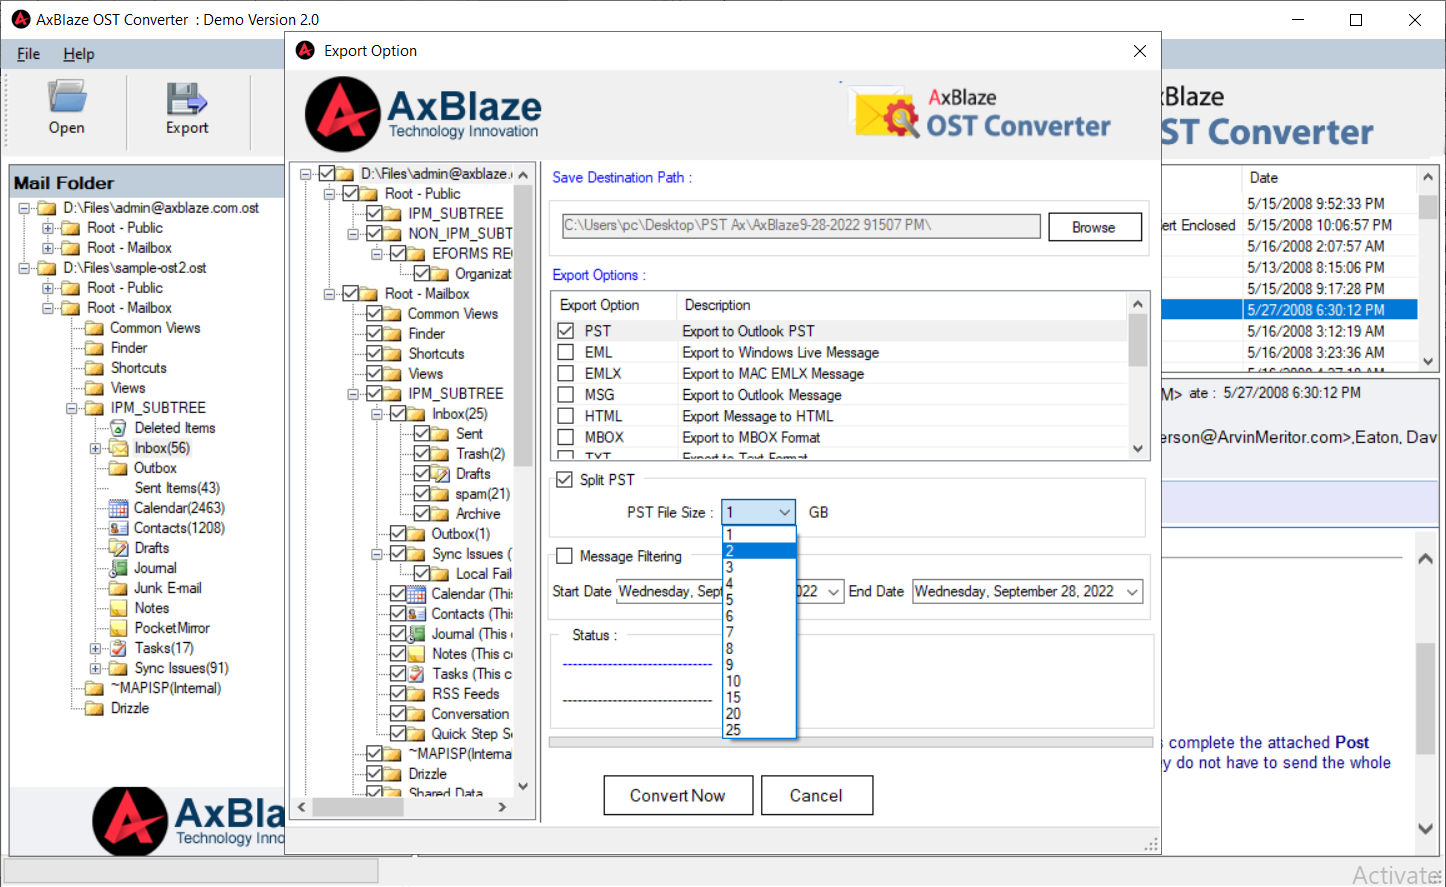
Step 4:
Split PST (Optional). Split PST by size.
- Select the "Split PST" checkbox and the required PST file size.
Move to the next step.
Step 5:
Message Filtering (Optional): Split resultant PST by date.
- Select the date range to filter items by date. It exports the items according to the date range.
Move to the next step.
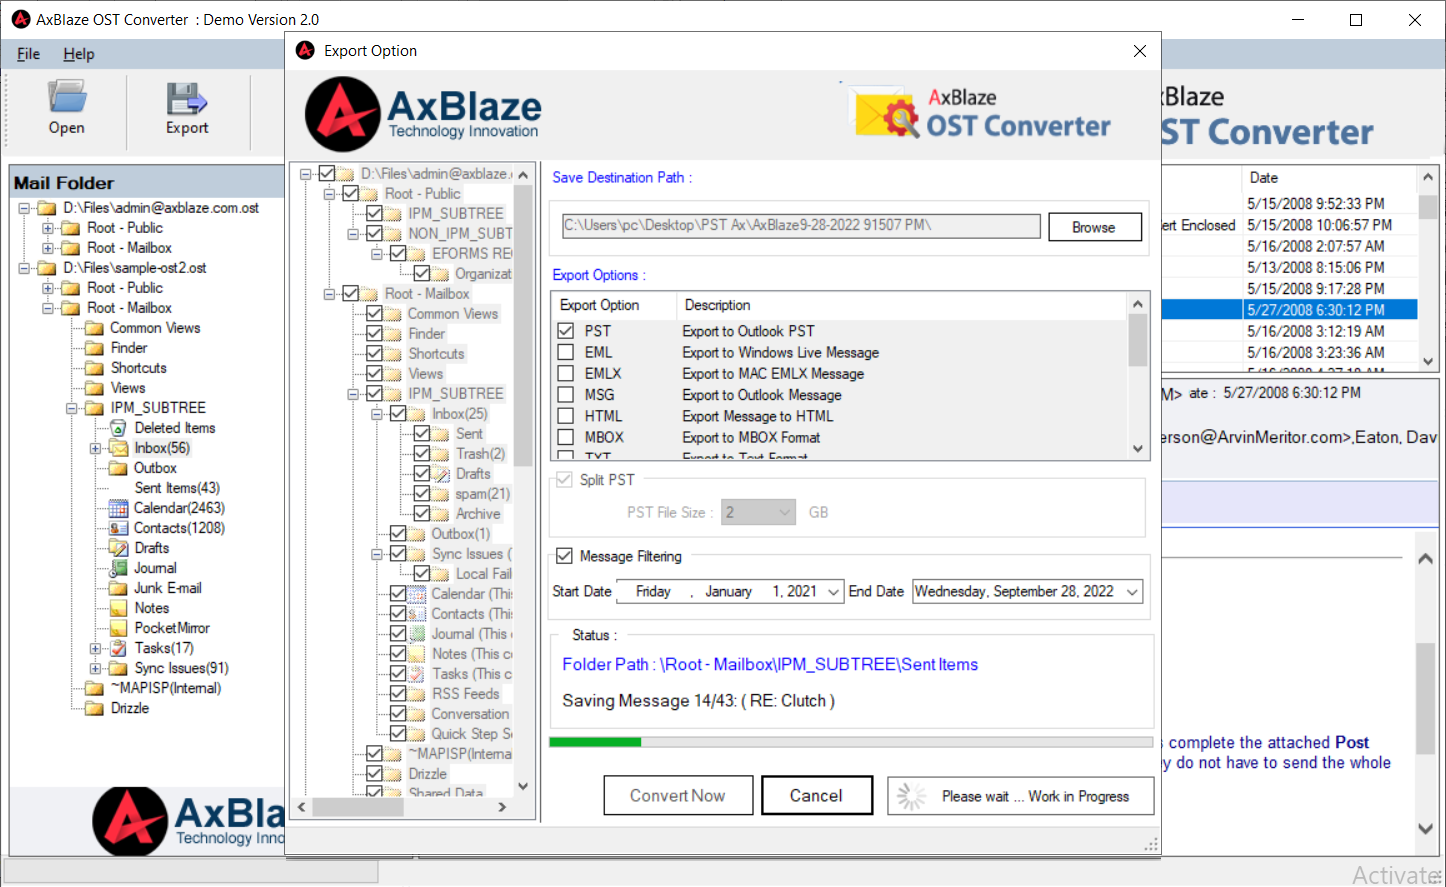
Step 6:
Convert OST to PST.
Click the "Convert Now" button to start the conversion process.
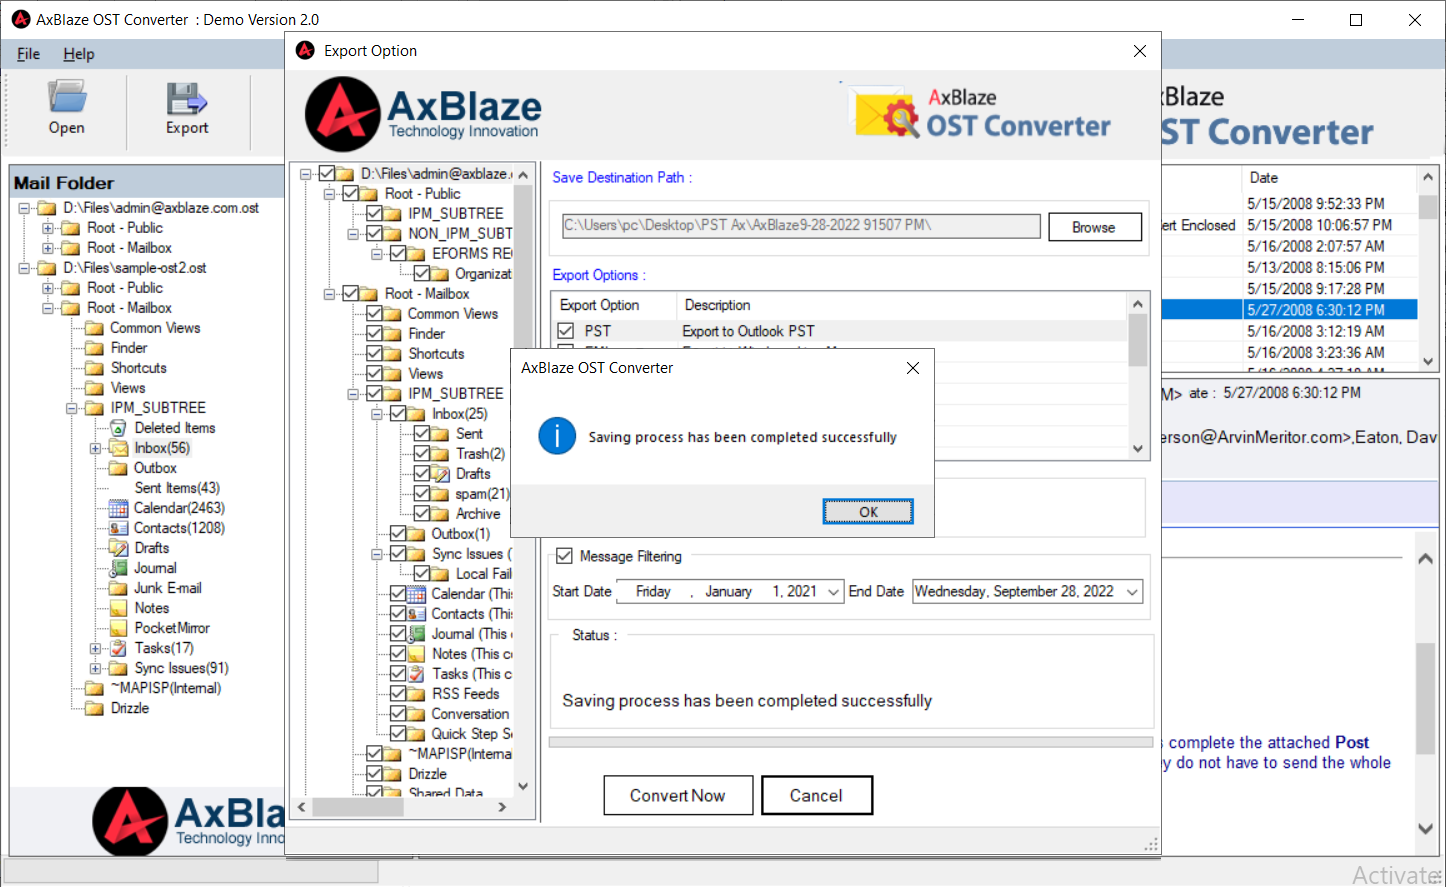
Step 7:
Final Message.
"Saving process has been completed successfully"
A pop-up window will appear after completing the conversion process.
If you still need any help, talk to our Experts.